Introduction
On this page, we will describe the use and purpose of Locations and Groups in Noah ES, for users with the required permissions. We will introduce the prerequisites for using completing this guide, Creating steps for creating a location or group, and show how to add your users and your patients to said a location.
Why locations and groups?
Locations and groups were added to Noah ES as a way for users to regulate and segment their database. For example adding all the patients who frequent a particular clinic, to a location in Noah ES, that represents that physical location and then further adding all the relevant clinical staff who see patients in that particular location. This way only the staff for whom it is relevant to this patient, will be able to see their patient data, providing additional security and control for the owner of an account.
Creating a Location
Congratulations you already created your first location! This is to say that all patients, when they enter when you sign up for Noah ES, are automatically assigned you have created a default location , under the name of the business . However, if and the BDM user account has been automatically assigned to that location.
If you wish to create additional locations, you may do so by following the following steps below. Please note that when you migrate a database to Noah ES, if you have set up Locations and/or groups, you can select the location in the Migration Utility and have all patient records being migrated assigned to that location.
Related Topics
| Child pages (Children Display) | ||||||
|---|---|---|---|---|---|---|
|
Q: Is it possible for a patient record to be assigned to multiple locations and groups?
A: Yes
Q: I currently use Noah System 4 and have multiple offices. Each office has a separate database. When I copy migrate the data into Noah ES can I indicate which location or group I wish for these patients to belong to?
A: Yes. If you have your locaitonslocations/groups set up then the migration utility will prompt you for you desired selection.
Q: Once patients are located in Noah ES is it possible to assign large batches of patients to a location or group?
A: This is currently not supported.
Log into the Noah ES Portal
For EU Customers: http://portal.eu.noah-es.com/
For US Customers: http://portal.us.noah-es.com/
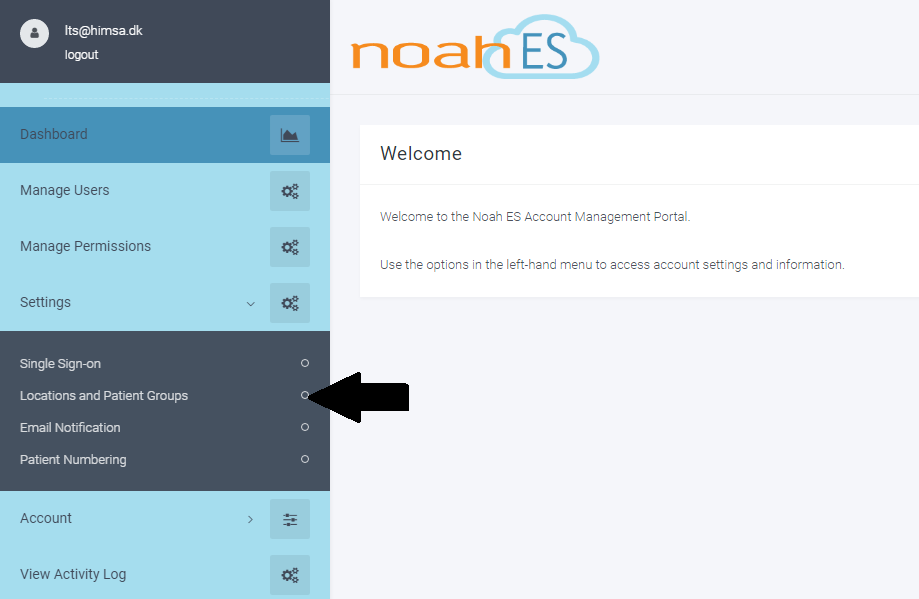
Select Settings, from the sidebar and then select Locations and Patient Groups from the drop down menu.
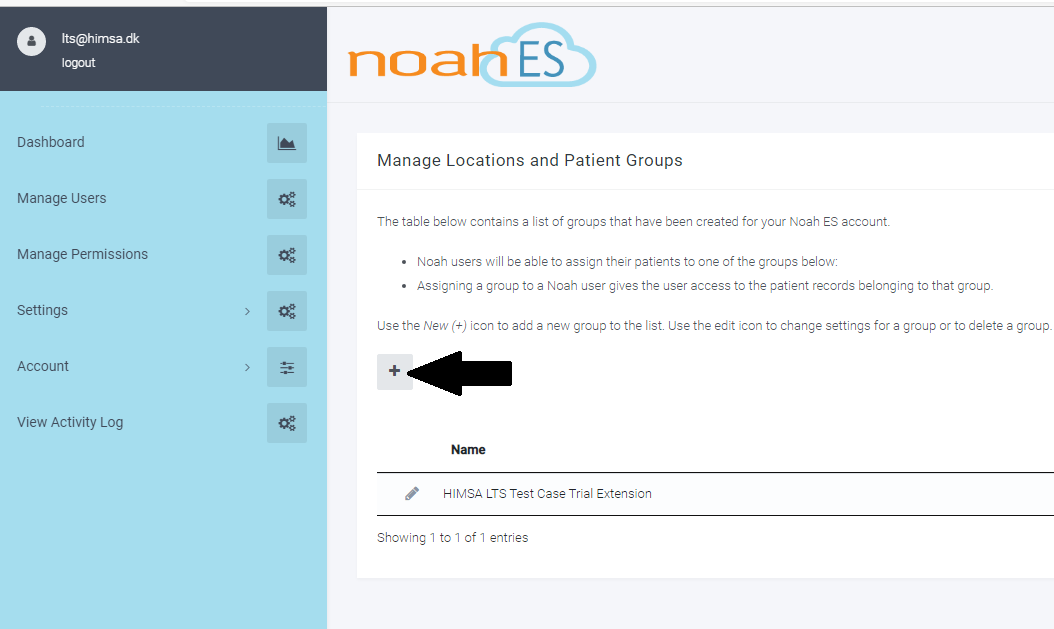
Select the plus sign, to add an additional group or location to your account.
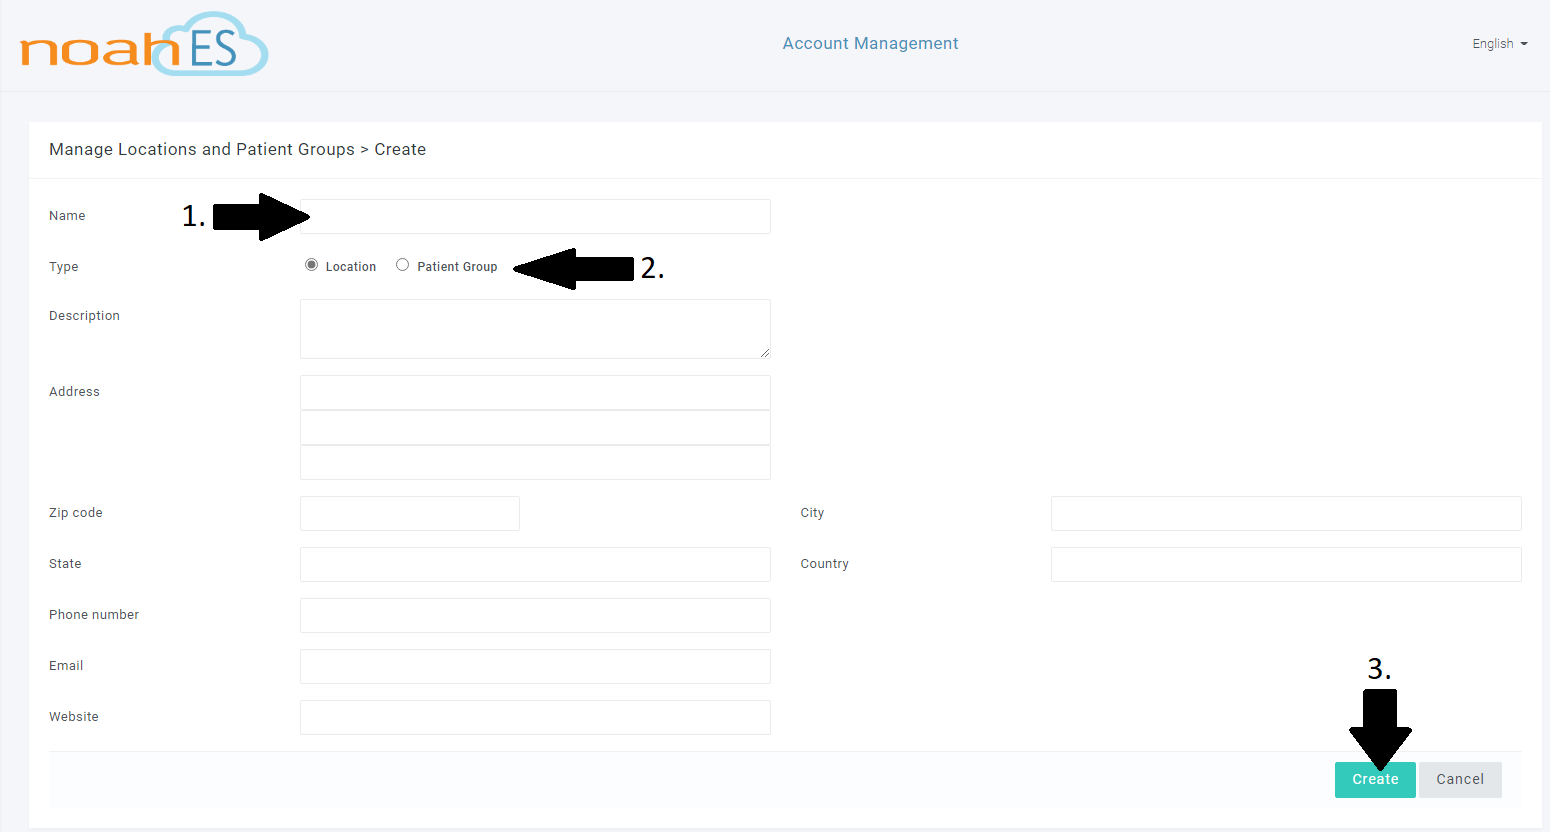
Now you may enter a name for your desired group or location.
Then
select whether it should be registered as a group or a location.
The main difference between the two is that locations offer fields to describe where the location is and how it may be reached.
Only a name and type are strictly required to create a new Group or Location.
Depending on what you have selected,
fill out the relevant text fields.
Next select “Create” and this will finish the creation of your new group.
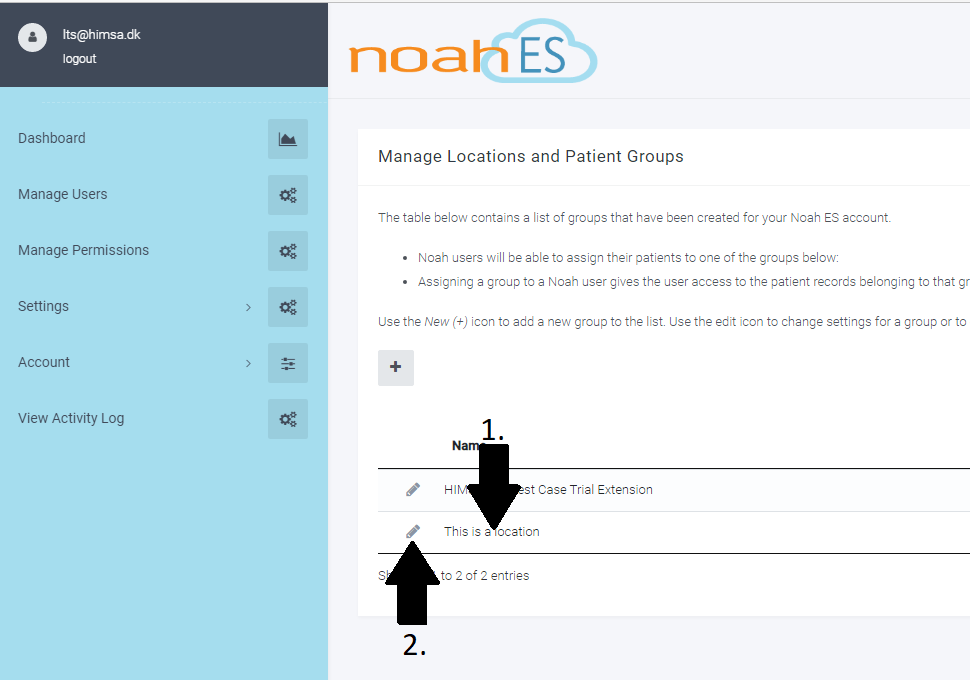
Your new location or group will appear in the list, under the Manage Locations and Patient Groups view.
You may
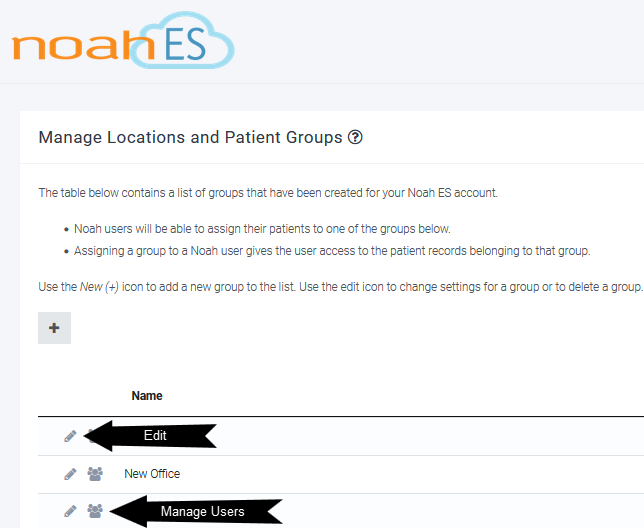
Edit existing groups or locations with the grey pencil icon, found on the far left of the listed groups and locations.
Now you have created a new group, it is time to add patients and users to it, as a group is not useful when no one is in it yet. Please continue, with Assigning Users below.
Assigning Users
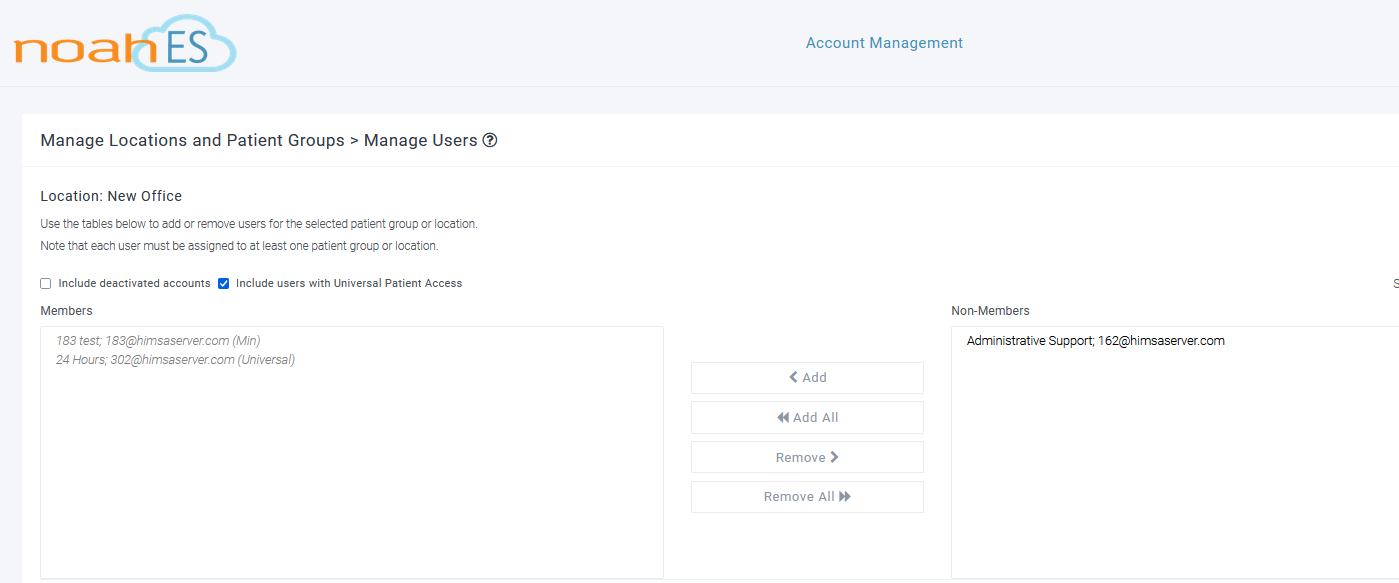
Select the Manage Users icon to review all Noah ES users that are members of the location or group and view a list of all non-members as well. Non members can be added to the group/location here. This Manage Users interface can help administer Noah ES users and the groups and locations they are assigned to.
Alternatively and probably most common will be to Assigning User to a group or location at the time the user is created.
Assigning Users
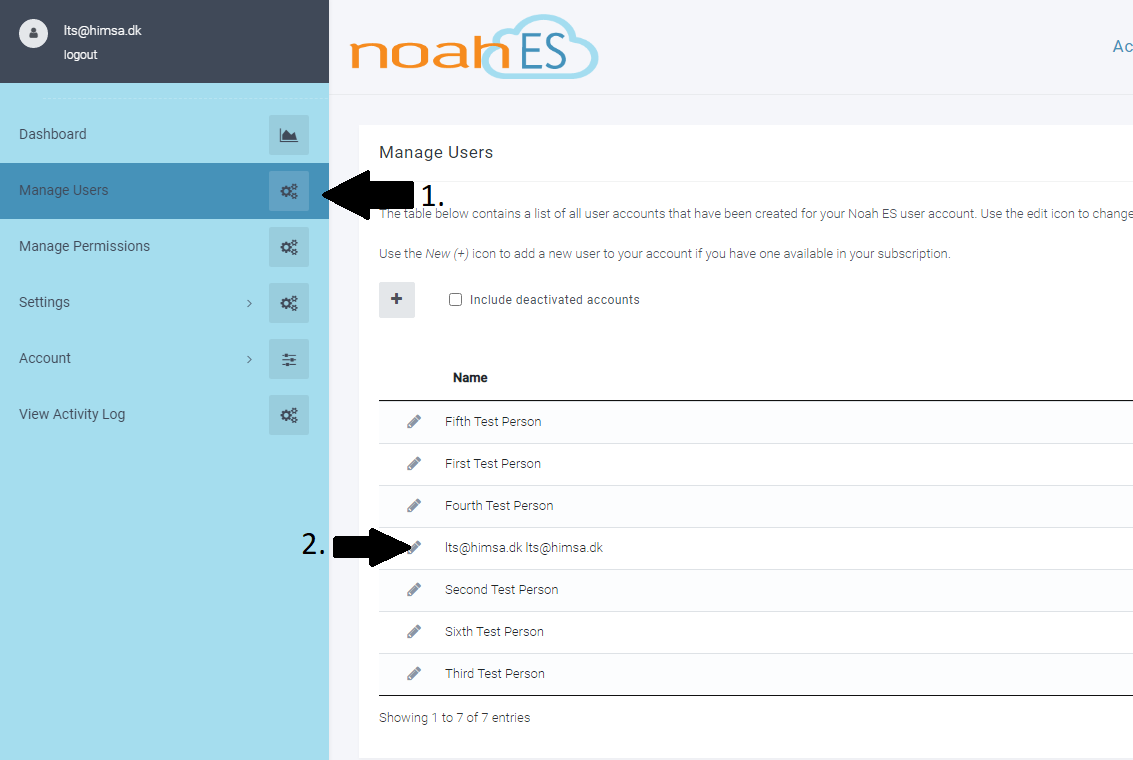
To assign a Noah ES user to a group/location, select Manage Users from the sidebar.
Then you may select the grey pencil icon, associated with
the user
found in the user list, in the Manage Users view.
In the Manage Users > Edit view,
select the Locations and Patient Groups drop-down menu and select the
Then select the button labeled “Save” which may be found in the bottom left of the view.
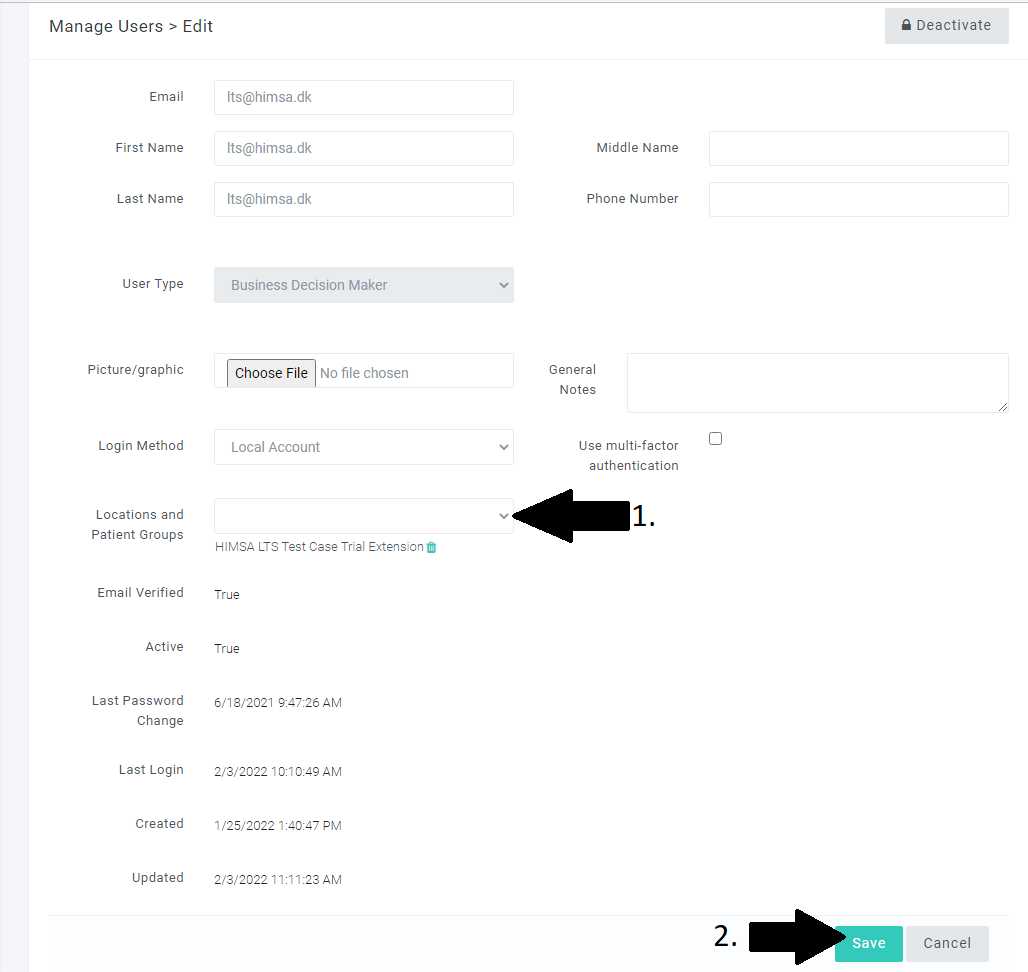
groups/locations the user will have access to.
The new selection will appear in the list of groups and locations that this user is associated with
found underneath the drop-down menu in Locations and Patient Groups.
When finished select Save.
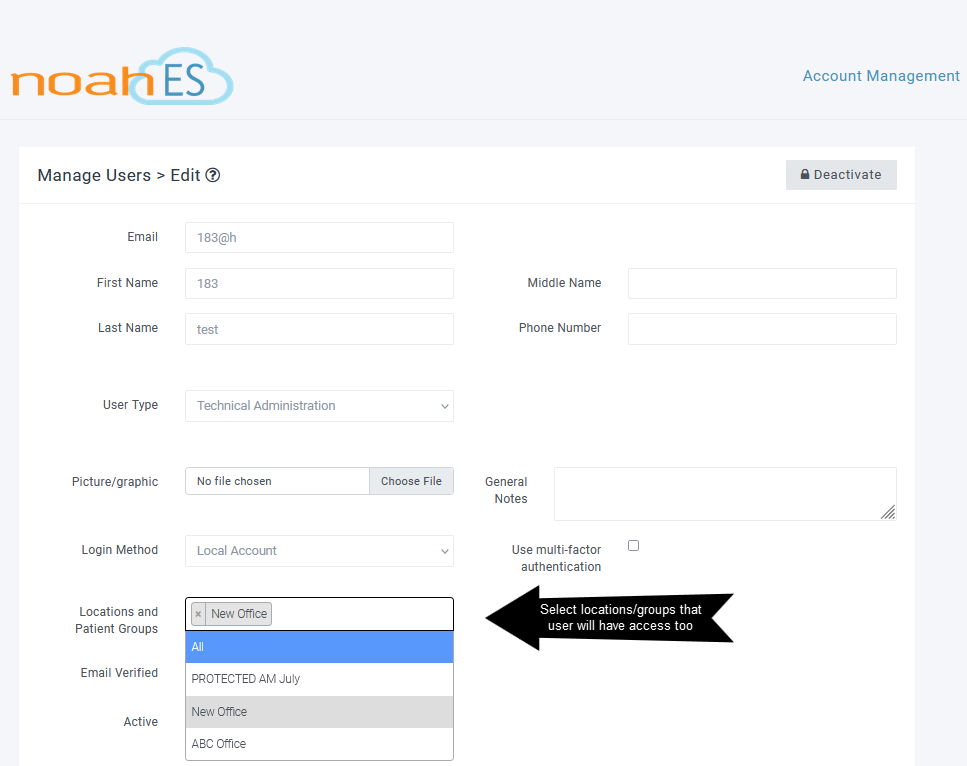
Please note the
Assigning Patients
option to have the user added to All groups if desired.
A user can be a member of 1-10 groups/locations, or have access to “All” groups and locations - including newly made groups and locations. The all option makes it easy to be sure that users can have universal access even as new groups/locations are created.
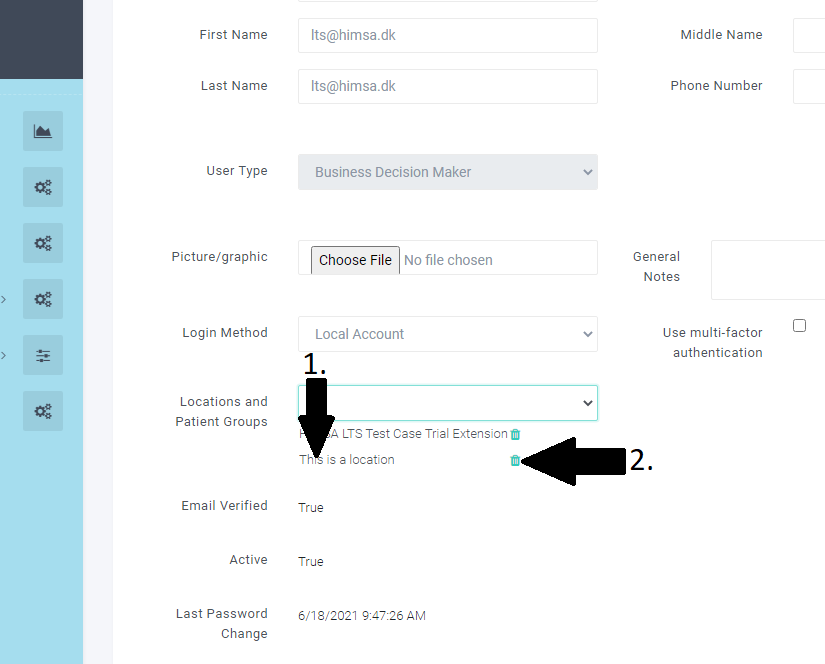
To remove a group or location from a user’s account, just click the X to the left of the group/location name and Save.
Assigning Patients
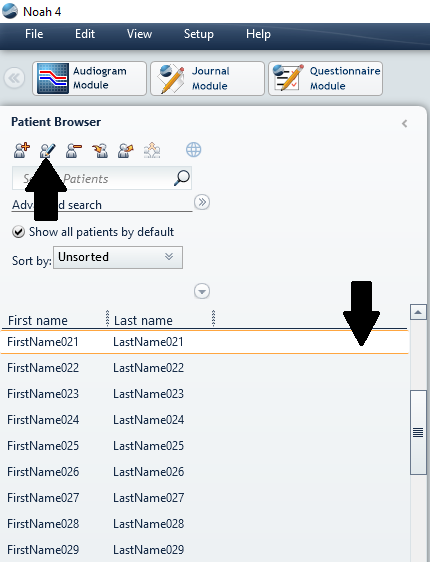
To assign existing patients to Noah ES Groups and/or Locations, launch Noah ES client and select a patient.
Select Edit, Edit patient from the pull down menu or the Edit/View a patient icon, to edit the selected patient.
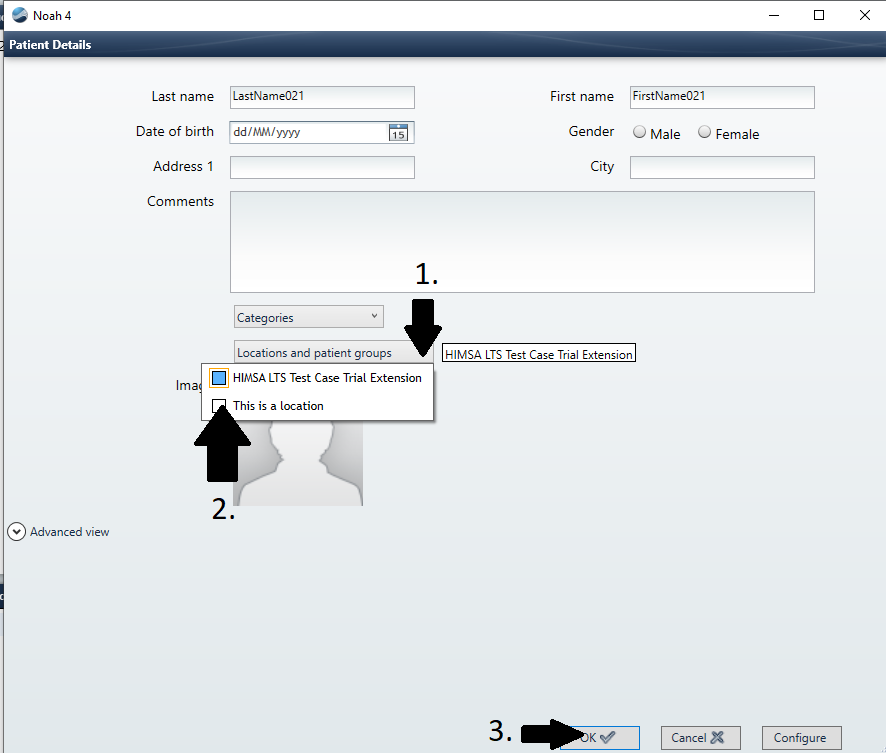
In the Patient Details view, select the Locations and Patient Groups drop-down menu
Then select the
group/location the patient will belong to. The selected/assigned groups/locations will now be visible, next to the Locations and Patient Groups
drop-down menu.
Then select the button on the bottom right, that is labeled with “OK”.
Your patient is now a part of
the selected location/group.
NOTE!
Should you wish to remove a patient from a given group, you may do so by selecting it from the drop down menu in this view.