
First - Review the technical prerequisites before continuing
Next - Download and install the latest version of the Noah ES Client Software

Three Easy steps to install Noah 4.14.2:
Open (Run) the file Noah_System_4.14.2.5678.exe to initiate the installation. You can accept all default installation prompts.
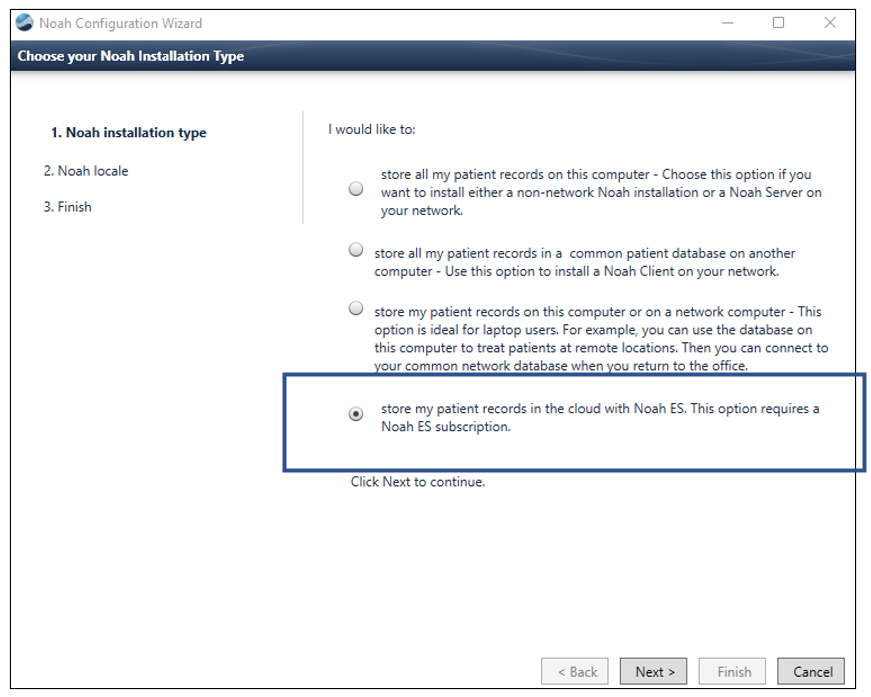
At the end of the installation, the Configuration Wizard will appear. Select the last choice “Store my patient records in the cloud with Noah ES….”
Click on the Next button and select your preferred language.
The Noah ES Client software will now start.
Q: I did not see the Configuration Wizard, do I need to be worried?
A: No, If Noah was ever installed the wizard will not be shown and this will not impact your next steps.
Last Step - Start Noah and Login Into Noah
If you need to sign up for a Noah ES account, please let us know here.
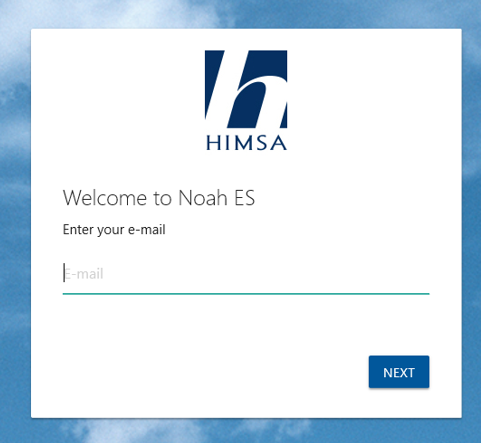
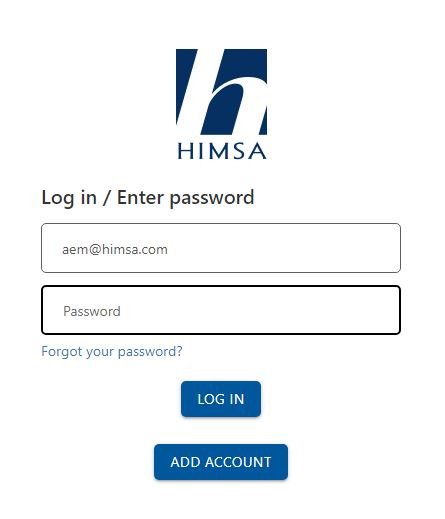
First time User Log on to Noah ES Launch Noah 4, at the standard Noah login, choose NoahES EU (Europe) or NoahES US (United States) from the pull-down menu. The login will then switch to the Noah ES login window: 2. Click OK, the log on process will continue in the default browser. 3. For a first-time user, the default OS browser opens showing the Noah ES Login and requests an email address. 4. Enter your email address and click Next: 5. Noah ES will search for all accounts which use this email address, if only one account is associated with the email, you will see the password entry screen. 6. Enter password, click LOG IN, the password is verified, and you have access to Noah ES. Once you successfully log in to an account and to the Noah ES Client, and are verified by the HIMSA IdP, on future Noah ES logins you will be presented with password request only. If you receive the message ‘Your password is not correct.’ Please review the issue here: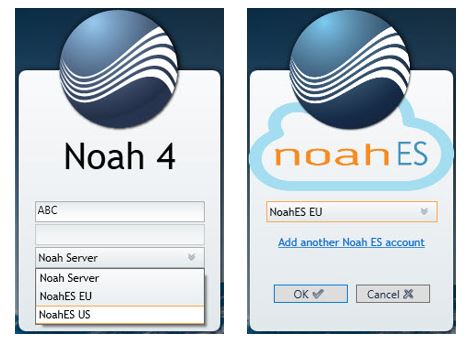
Related Topics
Learn more about Noah ES in the Support Portal